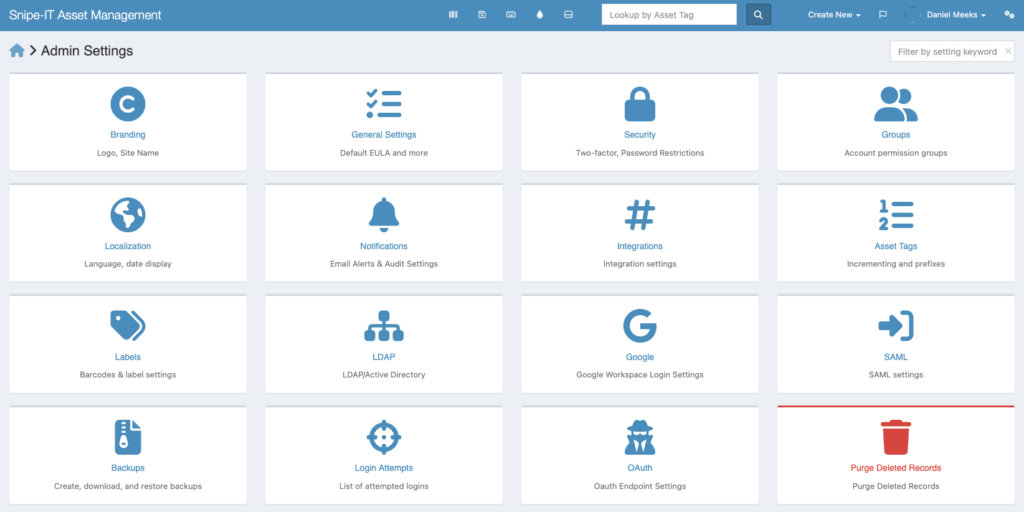
Now that we have deployed our AMS, it’s time to actually start using it. Let’s look through the Admin settings to get started. Choose the settings option in the far upper right which will bring you to the Admin settings.
Here we can see the main Admin interface. Lots of options here. I’ll go through a few to get you started and you can explore the rest on your own. For now choose the first option, “Branding”.
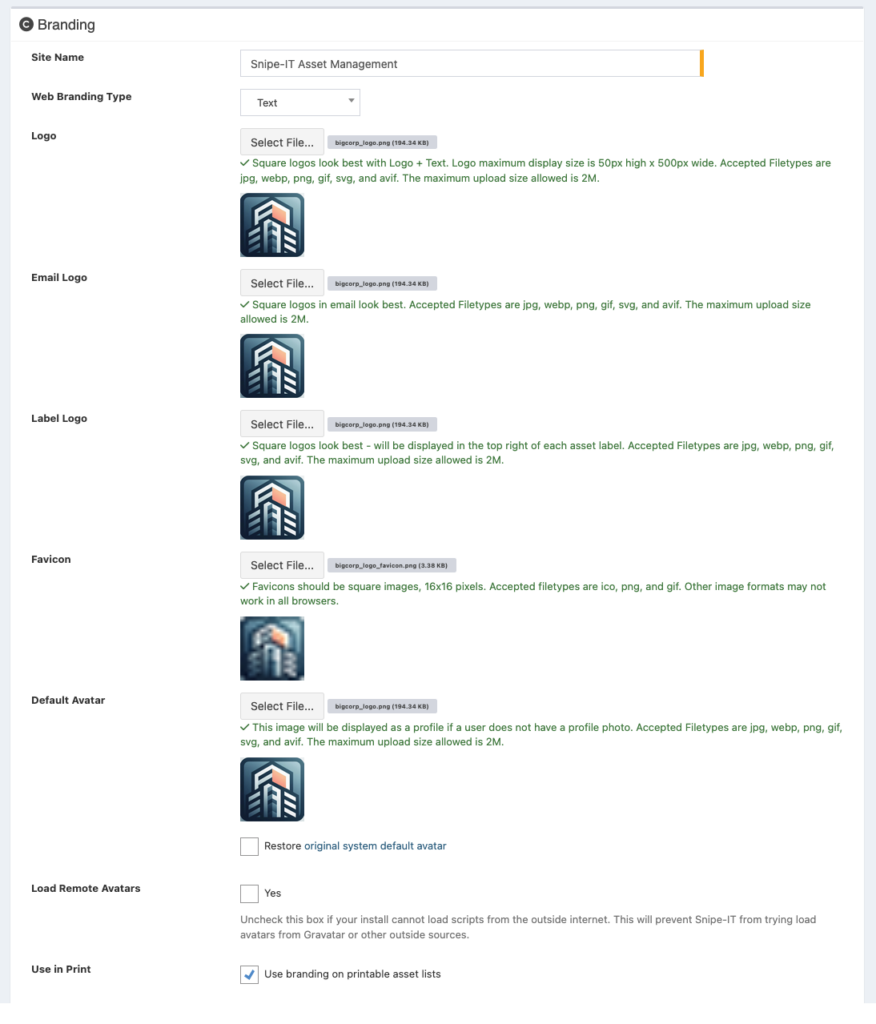
We have several options to go through. I will leave the site name as it is and upload a small logo I created for this demo purpose in the areas listed, as well as uncheck “Load Remote Avatars” and check “Use In Print”. The other options I will leave as default. Make sure to hit save at the bottom when done.
Go back to the Admin dashboard. We will skip over General settings as these are pretty self explanatory. Go to the Security settings next.
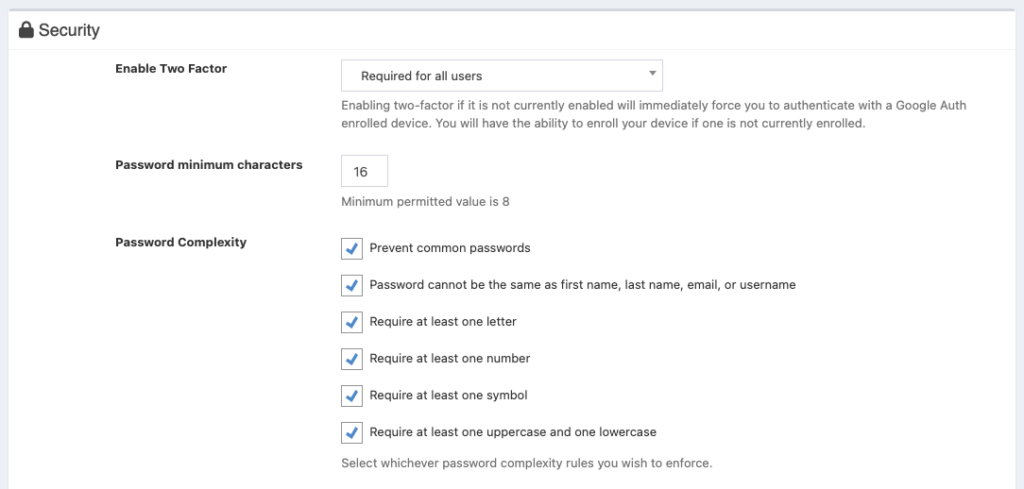
I highly recommend the security settings I have altered, especially if you will not be the only one using the asset management interface.
Now lets create a few groups. Think of groups within Snipe-IT just as you would with Active Directory. Different groups have different permissions and it’s much easier to assign a user to a group with set permissions than assigning permissions to each individual.
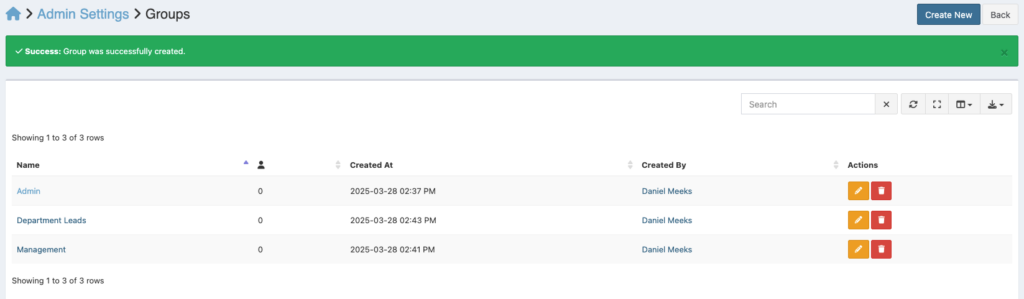
I’ve created three groups in my example. Admin will be those who are in charge of the AMS itself and will be given full permissions (usually the IT department). Management will be leaders of the organization such as the President, Vice President, CEO, CFO, and CTO. This group can see all assets within the company and their characteristics, usually for auditing purposes, but aren’t necessarily the ones who are actually checking in and out assets. Department leads will be people like the sales manager, production manager, etc., people who users go to and request assets from. This group has permissions to check in and out assets as well as make notes for IT to see regarding condition of assets. This is only an example group structure. Your group structure depends entirely on how your company is organized. In many cases the IT department is the only department that will see the AMS, and they will be the ones to fill in who checked out what and when.
Go back to the main Admin Settings dashboard. Localization and Notifications are self explanatory so I will skip those, although they should be filled in. Integration is for integrating Slack using a webhook and Slack bot. This is a very handy feature but outside the scope of this article. I will create a separate post explaining the usefulness of Slack bots within your organization and how to create them.
Next we’ll explore the asset tag settings.
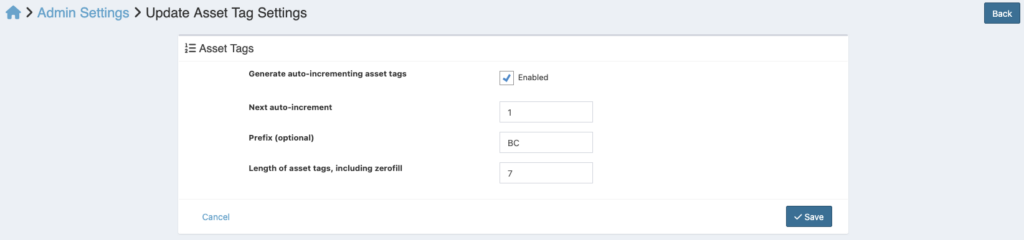
This information will be what’s actually encoded within your label barcodes or QR codes. I’ve chosen BC as my prefix, standing for our fictional company BigCorp, and for the length I’ve chosen 7, which will give us tags for a million assets. For example, as I’ve chosen auto-increment, the very first label will be BC0000001. You should adjust this depending on your needs. Save your changes and choose Label settings next.
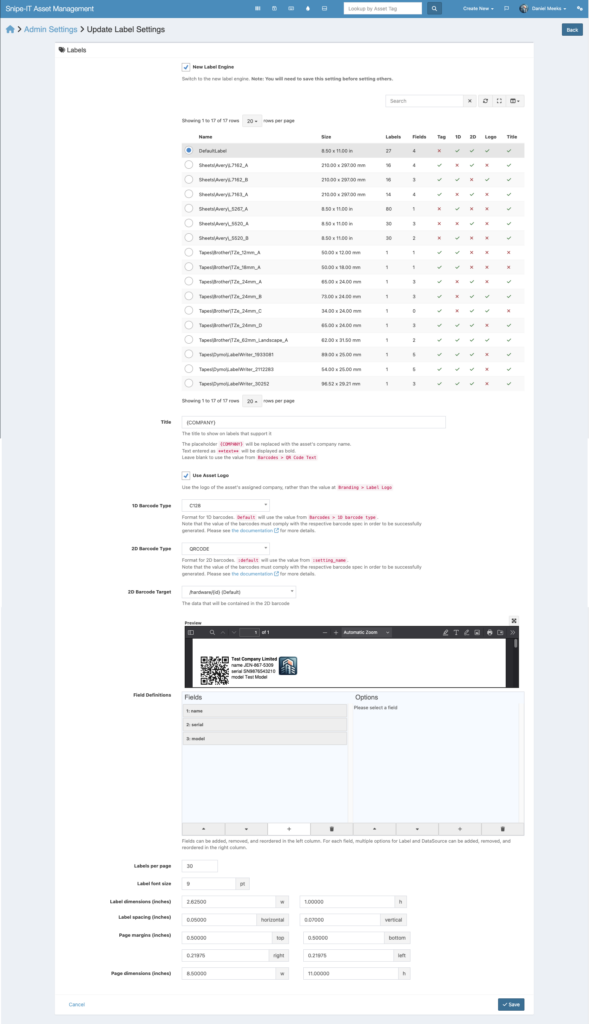
These settings will depend on how you want your label to look. I have chosen a generic label stock from the top and added the company placeholder for the title. When we create our company in the settings it will be printed at the top of the label in bold. You can see an example of how our label will look in the print dialog box. The asset’s name, serial number, and model are printed as well as our company logo and QR code for scanning purposes. Choose the LDAP/AD settings next.
These settings are so organizational specific that there’s not much point in me going over them. If you are an IT administrator you will have LDAP and Active Directory experience if your company uses them. If you are using them, then you will want to configure your AMS to use them as well. A word of caution, if you use LDAP/AD to manage users with asset management, do not add users manually within Snipe-IT. You will inevitably have duplicate users which will lead to confusion. Pick one method or the other and stick to it.
The next two setting management options are Google and SAML. Google is for integration with Google Workspaces and SAML is for SSO (single sign on). Both of which are organizational dependent as well. Choose Backup settings next.
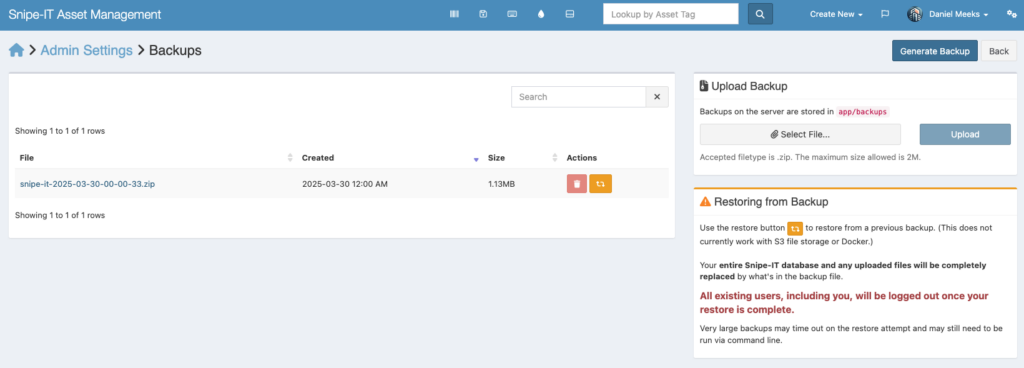
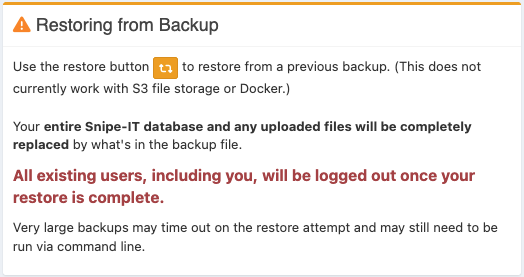
It is always recommended that you make backups of your data, and that integration is built into Snipe-IT. Since I am using a hypervisor to host Snipe-IT, I am making automated twice-daily backups via a remote backup solution that backs up the entire application environment instead of using the built-in integration. If you choose to use Snipe-IT’s backup integration, please make note of the cautionary text displayed:
The next two settings, Login Attempts and OAuth, are self-explanatory as well.
In the third and final part of this series, we will create a company, create users and add them to groups, add assets, and explore other options within Snipe-IT.
Leave a Reply