An asset management system (AMS) is like a super-organized inventory for all the “assets” a company owns—whether it’s gear, gadgets, software, or even ideas. It keeps track of where everything is, how it’s doing (if it needs maintenance), how much it costs, and how it’s being used. Think of it as a detailed map that helps businesses stay on top of their assets without losing track of anything important.
Why is it a big deal? It saves money by pointing out what’s underused or needing upkeep, and it helps avoid downtime by catching issues before they become problems. Plus, it keeps everything running smoothly by showing what should go where and when. In the end, it’s a tool to help businesses work smarter, not harder, while keeping their resources in tip-top shape.
An AMS can be expensive, and not all companies have the budget for the software licensing. Company leads may not see the need for an AMS, referring instead to complicated spreadsheets or paper inventories. In today’s environment, you really do need a proper AMS. It will make your job infinitely easier and help to track assets to ticketing issues as well. In a later post I will explain the integration of an AMS to a ticketing system, but for now let’s just focus on deployment and use of a popular open source AMS, Snipe-IT.
There are multiple ways to install Snipe-IT, from source compile to setup scripts. I will be deploying Snipe-IT using Docker to keep things simple.
I’m going to setup the environment within a Linux Container (LXC) on Proxmox, a popular hypervisor based on the Debian operating system.
While your node is selected, choose “Create CT” from the menu on the upper right.

This will bring up a dialog with several options.
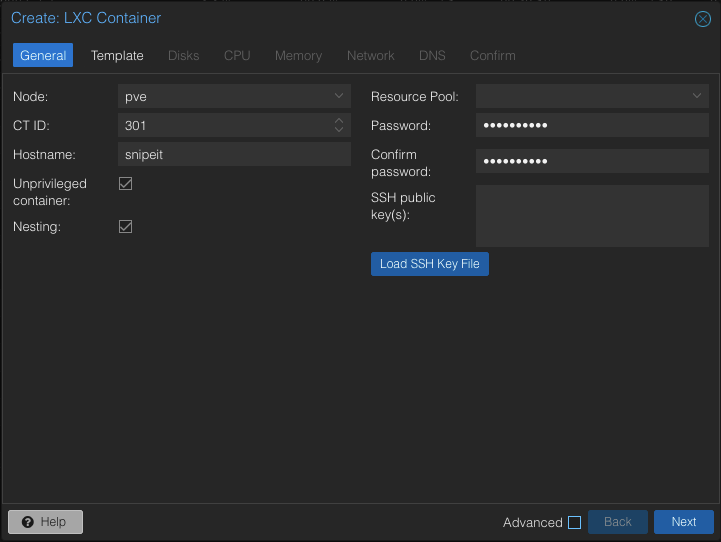
Choose a numerical CT ID, a hostname, and a password. Leave the other options as default. You can configure your SSH key access as well but I prefer to do this later during setup. Next go to “Template” options.
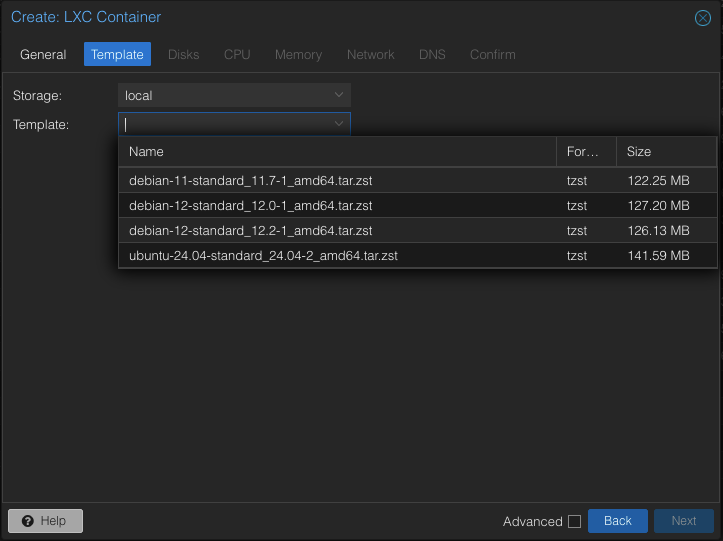
Here I’ll choose the Ubuntu server option from various templates I already have saved to my local storage media. Go to “Disks” options next.

Choose your storage option as well as your disk size. 8GB is more than enough for demonstration purposes but you will want to adjust this according to your needs. Next choose “CPU”.
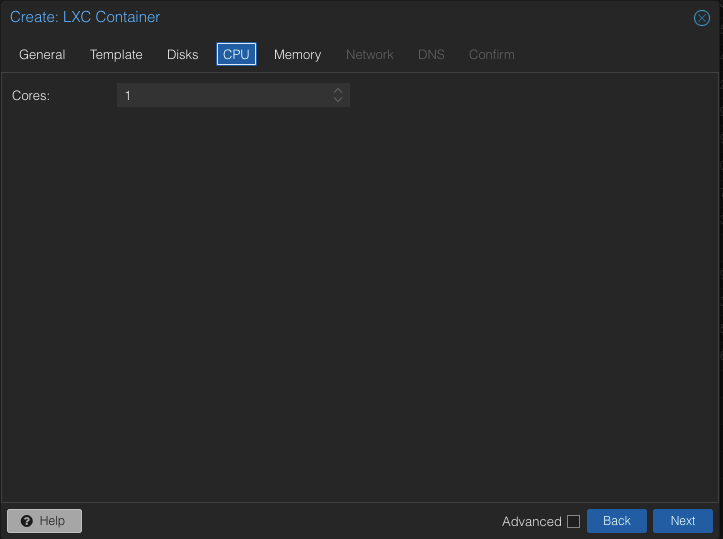
I’ve chosen a single core here and to be honest, unless you are running this on older/underpowered infrastructure, a single core is plenty even for production. Next choose “Memory”.
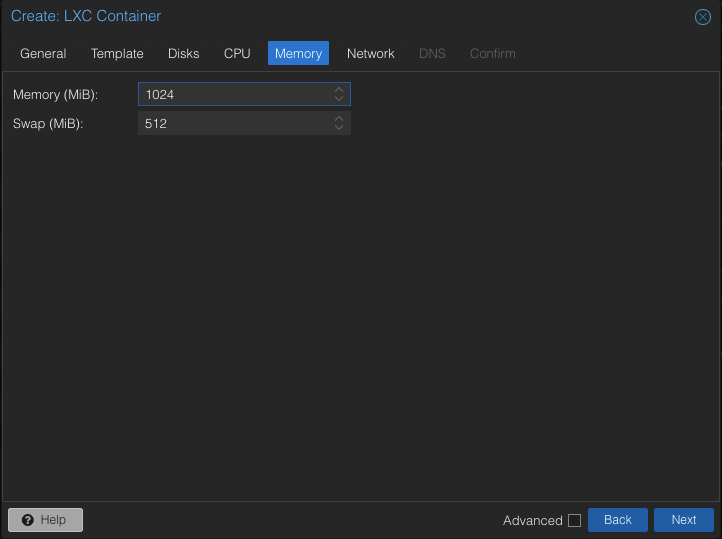
I’ve chosen 1GB with another half as swap for demonstration purposes. In production you will want to raise this value. I suggest 4GB to start and adjust from there. Next move to the “Network” option.

In the Network options we will be choosing DHCP for IPv4 addressing and SLAAC for IPv6. You will want a static address for your environment but best practices is to set this within your DHCP server itself.
We will skip DNS settings as these are specific to your organization and network settings, but you need to fill these out according to your needs. Let’s look at the final configuration.
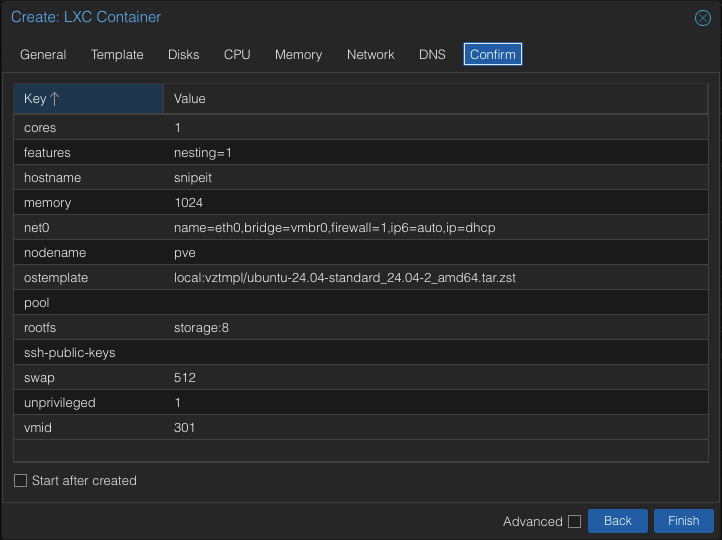
The “Confirm” menu gives an overview of the options we have configured. We will leave “Start after created” unchecked as there are a couple of other things we need to do before booting into our new environment. Click finish.
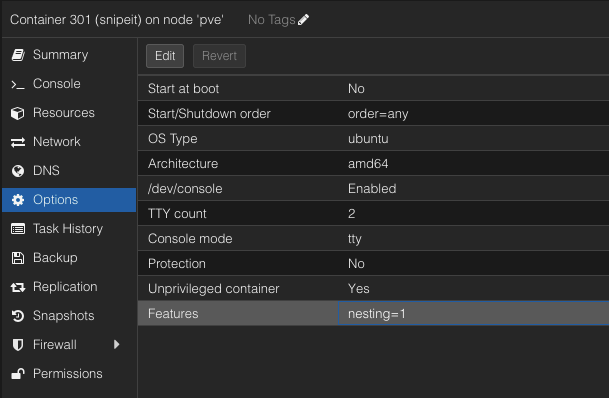
Select the new LXC you have created and choose options from the left menu. At the bottom you will see “Features”. Double click this option.
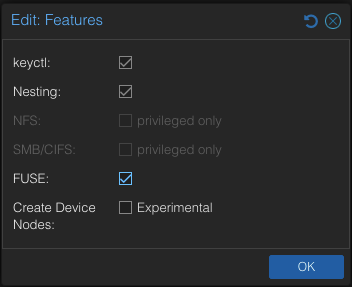
For Docker containers to work correctly within a LXC, we need to enable “keyctl” and “FUSE”. More information regarding these features can be found here.
After choosing OK, start your container and boot into your environment. I am assuming you have at least a passing knowledge of Linux administration regarding setting up and securing a new installation so I will not go into that here. You will need to install Docker next. Since I am using Ubuntu Server, I will follow the instructions here.
Following best practices, specifically the principle of least privilege, you will want to create a user just for Docker administration and add them to the docker group only. I name the user after the application they will be administrating, in this case “snipeit”.
# adduser snipeit$ sudo usermod -aG docker snipeit
Logout and log back in using the snipeit user.
Now logged in as our snipeit user, we can setup what we need to pull down and deploy the Snipe-IT Docker image. You can find the official docs here.
$ mkdir snipeit$ cd snipeit
$ curl https://raw.githubusercontent.com/snipe/snipe-it/master/docker-compose.yml --output docker-compose.yml
$ curl https://raw.githubusercontent.com/snipe/snipe-it/master/.env.docker --output .env
We need to edit the environment file (.env) in order to adjust the settings to our use case.
$ vim .env
Make sure to change the appropriate settings. You can make a backup of the .env file as well before changing your environment variables.
$ cp .env .env.bak
As an example, here are the environment settings I have changed:
APP_VERSION=latest # this will pull the latest image
APP_KEY=<new key> # instructions for generating a secure key are included within the file itself
APP_URL= # the full URL you will be accessing Snipe-IT from
APP_TIMEZONE='America/Chicago' # this is my timezone.
DB_PASSWORD=changeme1234 # change this.
MYSQL_ROOT_PASSWORD=changeme1234 # change this.
MAIL_MAILER=smtp # change these options according to your mail server.
MAIL_HOST=<email host>
MAIL_PORT=<outgoing mail port>
APP_TRUSTED_PROXIES=<your proxy IP>
Save the file.
Now let’s bring up the containers and check out our new site. I like to launch a screen session while doing a test run first, just to watch the docker logs live, this is my process. First, cd into the snipeit directory then:
$ screen -S docker
$ docker compose pull
$ docker compose up
You should see the logs start to scroll. If there are no errors, open a browser and visit your Snipe-IT URL. You should be presented with a pre-flight screen like this:
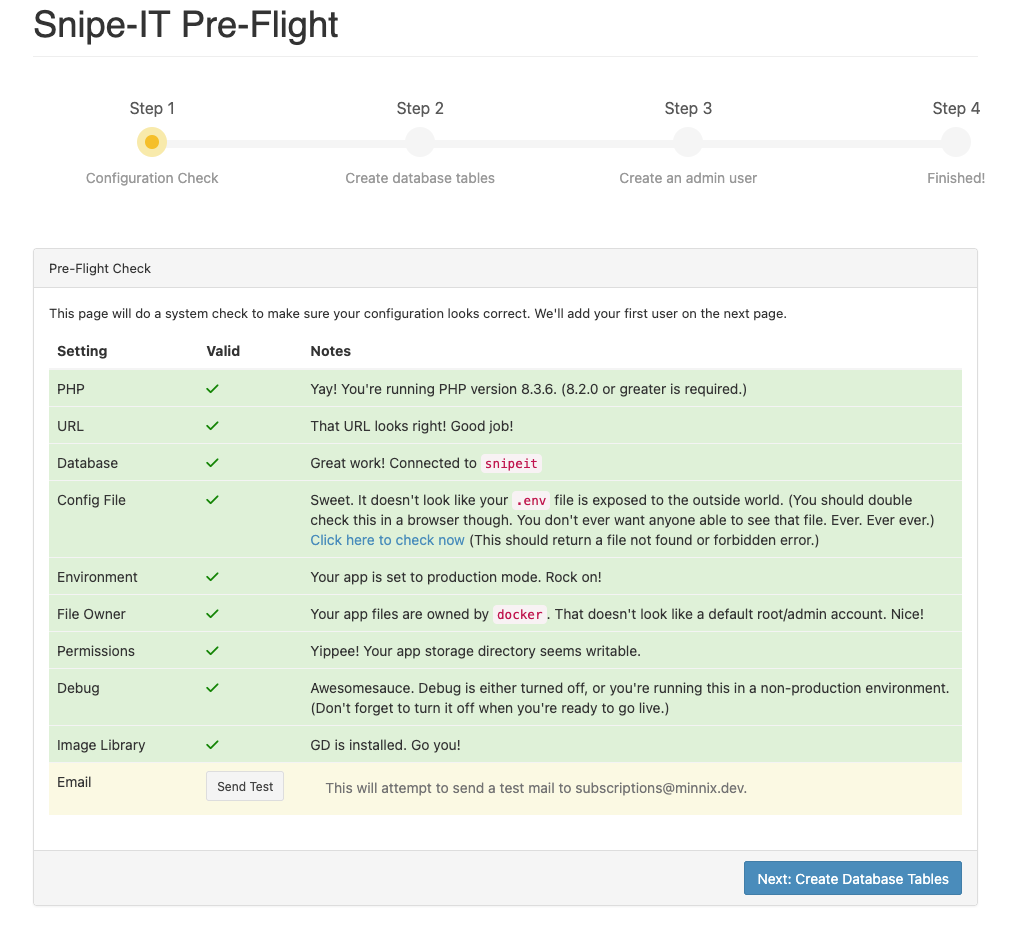
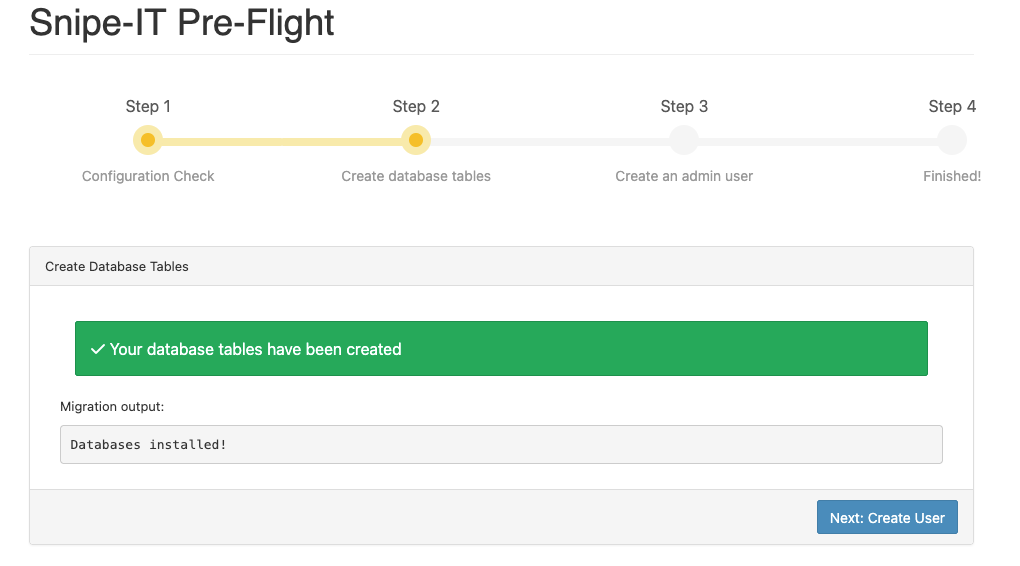
If everything looks correct, choose “Next, Create Database Tables” at the bottom of the screen. On the next screen you will be prompted to create a user:
Next you’ll fill in your credentials:

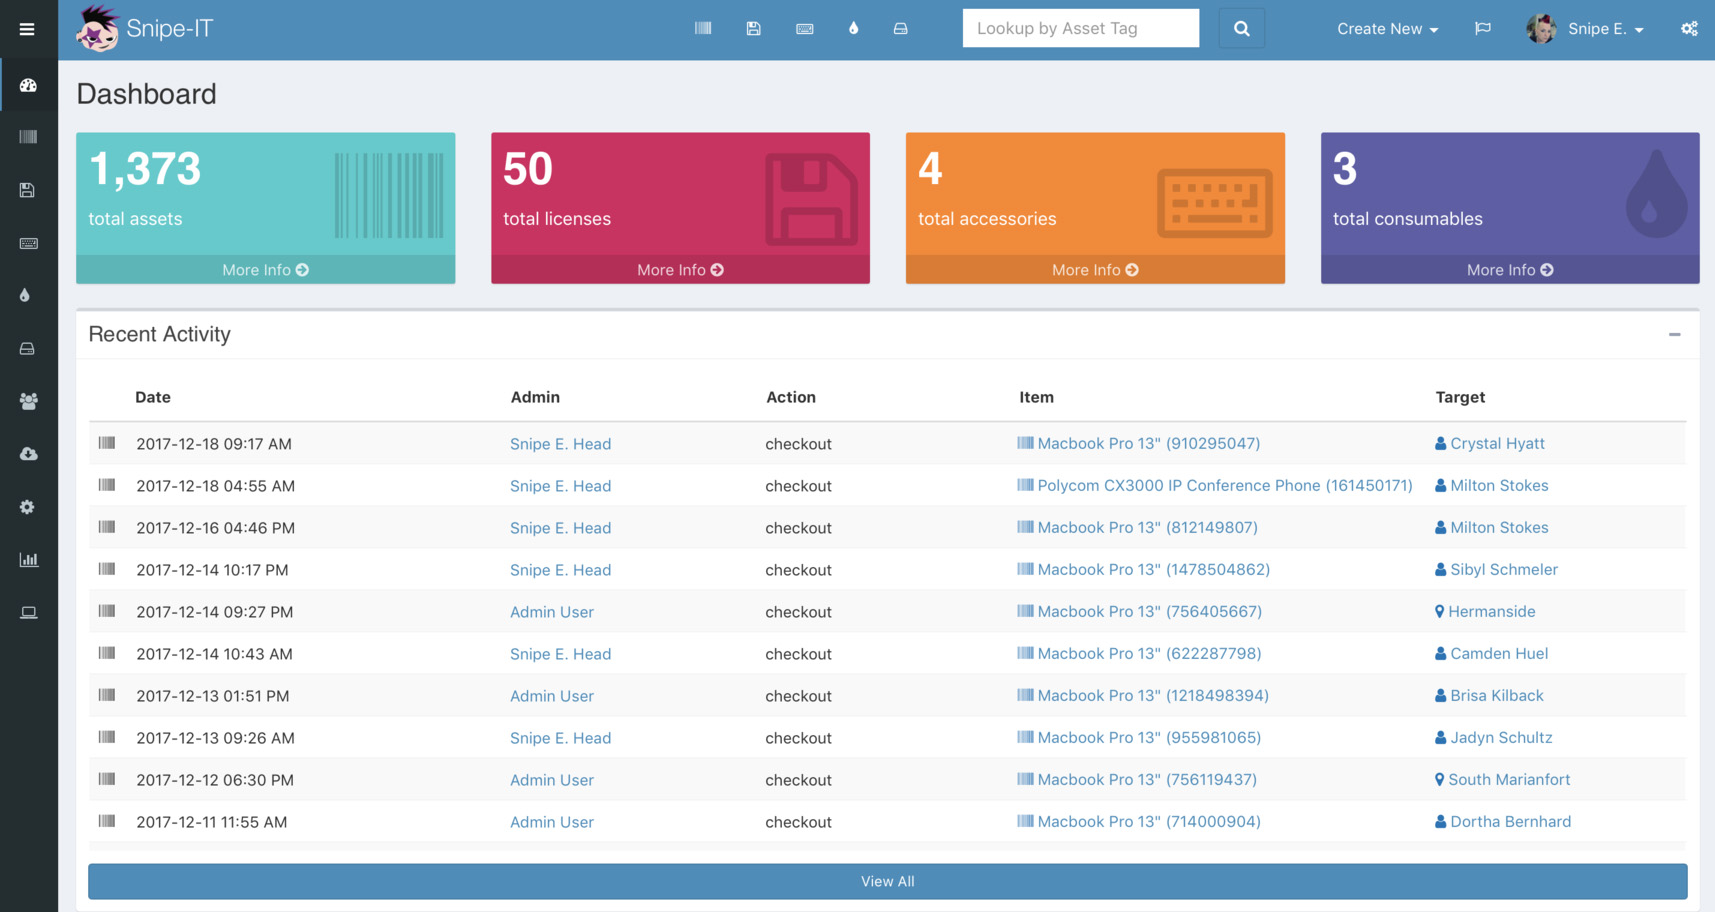
You’ll be presented with the Snipe-IT interface if everything went well:
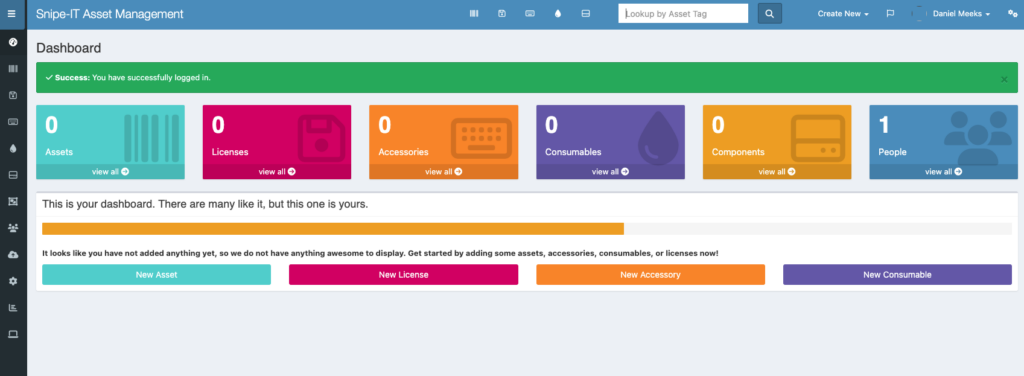
Make sure to logout/login again as well as test your email to make sure everything is working correctly. In part 2, I’ll run you through some common scenarios where you will start using Snipe-IT to manage assets and get you comfortable with simulated asset management situations that you may experience on the job.
Leave a Reply